
No products in the cart.
Email Marketing
12 Email List Management Best Practices for 2022 (+ Infographic)

18
Jan
Jan
In digital marketing, there is a tendency to measure results based on the size of our audience.
We’re preoccupied with how big our email list is, how many followers we attract, or how many people subscribe to our channel. At the same time, we completely ignore the importance of keeping our audience engaged. And terms like email list management don’t even make it to our dictionary.
In other words, our activities are typically measured based on growth, but not the less favorable issues like list attrition. And holding onto large segments of inactive data and treating these contacts as if they were actively engaged will lead to future challenges.
In email marketing, in particular, a low engagement rate isn’t just bad because you’re not using your audience to their full potential. It’s bad because it affects your email deliverability – the overall ability to reach your subscribers’ inboxes and meet your revenue goals.
Naturally, it’s not possible to keep everyone engaged in what you do or say. That is why your email marketing strategy should also lay out the rules for what you’re going to do, e.g. with those who are no longer engaged in your email communication.
This is where email list management comes into play. It’s about making sure that that you collect user personal data the right way, your contact lists are healthy, that your email campaigns don’t get buried in the spam folders – or worse – blocked entirely.
In this article, we’ll help you set those rules. We’re going to share 12 email list management best practices that’ll help you keep your recipients happy and your email database clean. We’ll also highlight how you can implement all these tips using GetResponse.
Bonus: If you’d prefer this information in a more visual format, check out our infographic at the end of this article.
Table Of Contents
But first, what is email list management?
Email list management describes the strategy of managing and controlling email subscribers in your lists and segments.
It overlooks various processes, starting from maintaining updated tagging and segmentation to removing duplicates, unsubscribes, and unengaged email addresses from your contact list.
Through this strategy, you can send more targeted emails, which is essential to delivering engaging and highly converting email campaigns.
Benefits of proper email list management
Email list management isn’t just good practice. It’s a strategy that can put you ahead of other business and transform your email marketing program into one that generates an outstanding return on investment.
Here’s what you can achieve through managing your email contacts:
- You’ll have a better understanding of your audience, including the key segments that generate the most value for your business.
- You’ll have more reliable data and will be able to send more personalized emails that drive more revenue from your campaigns.
- You’ll achieve a higher inbox placement rate as spam filters rely heavily on email users’ engagement
- You’ll maintain a healthy list, free of unwanted addresses such as spam traps, unengaged contacts, and fake email addresses.
- You’ll lower your costs, as most email marketing providers charge you based on the size of your contacts list or the volume you send to.
Now that we understand what email list management is and know its value, let’s go into some best practices you can start working with.
GetResponse Email List Builder offers everything you need to grow and manage your contacts lists effectively. The features include Signup Form Builder, Advanced Tagging and Segmentation, Consent Management, and more.
Best practices for managing an email or contact list
Here are 12 best practices you can use to get started and improve your existing email list management processes.
1. Ensure your opt-in forms are set up properly
Although you likely already have an email database, it makes sense to start at the top of the funnel and ensure your signup forms are set up properly.
What I mean by that is that not only your signup forms are secure and add new contacts into your email database in real-time, but also that you collect the user consent the right way.
Doing this, you’ll save yourself the trouble later filtering subscribers who aren’t interested in your offer or never intended to join your list in the first place.
Here are the general rules you’ll want to follow in your signup forms:
- Be specific and fully transparent about what your users are signing up for. You don’t want to trick people into joining your subscription by making false promises.
- Ask your visitors only for the absolutely essential personal information, like name and email address. In most cases, that’s all you need to send relevant content to your audience and you can gather any additional information (like company name or birthday) later.
- Get explicit consent if you’re planning to send marketing emails to your contacts. You can do this by adding an optional checkbox that’ll let users choose if they want to join your list.
- Provide additional information about how you’re going to process user data, how subscribers can edit or have their data removed, and how they can access your privacy policy information.
- Ideally, use confirmed opt-in to verify the new email subscribers and filter out invalid email addresses right away.
In addition, on your website or landing page, you may also want to add extra security features that’ll help you filter out bot traffic and avoid the so-called mail bombing. With free services like Google’s reCAPTCHA, you can ensure that your forms will not be compromised and no bots will be automatically added to your email list or customer relationship management system (CRM). And rest assured, with reCaptcha installed your page will still function properly and let real users submit your forms.
 Newsletter subscription form created using GetResponse Signup Form Builder
Pro tip: GetResponse Signup Form Builder lets you set up signup forms that’ll help you capture leads and transfer them into your database automatically. On top of that, thanks to the consent fields feature, it also helps you stay GDPR-compliant and manage your user consents properly.
2. Verify new contacts with confirmed opt-in
We’ve briefly touched upon confirmed opt-in a.k.a. double opt-in in the previous point, but it’s worth going over this in a bit more detail
Especially given that it’s considered the gold-standard of email marketing by numerous organizations, including Spamhaus and M3AAWG.
With proper email list management, you’ll be able to filter out the unengaged email subscribers no matter where or when they start to become unresponsive. However, confirmed opt-in can help you ensure that only quality contacts join your list in the first place.
Here’s how it works:
Step 1. In your signup form, you notify the new contact that in order to fully join the subscription they need to verify their email address by clicking the link in the confirmation email.
Here’s how Further does it on their newsletter signup thank you page:
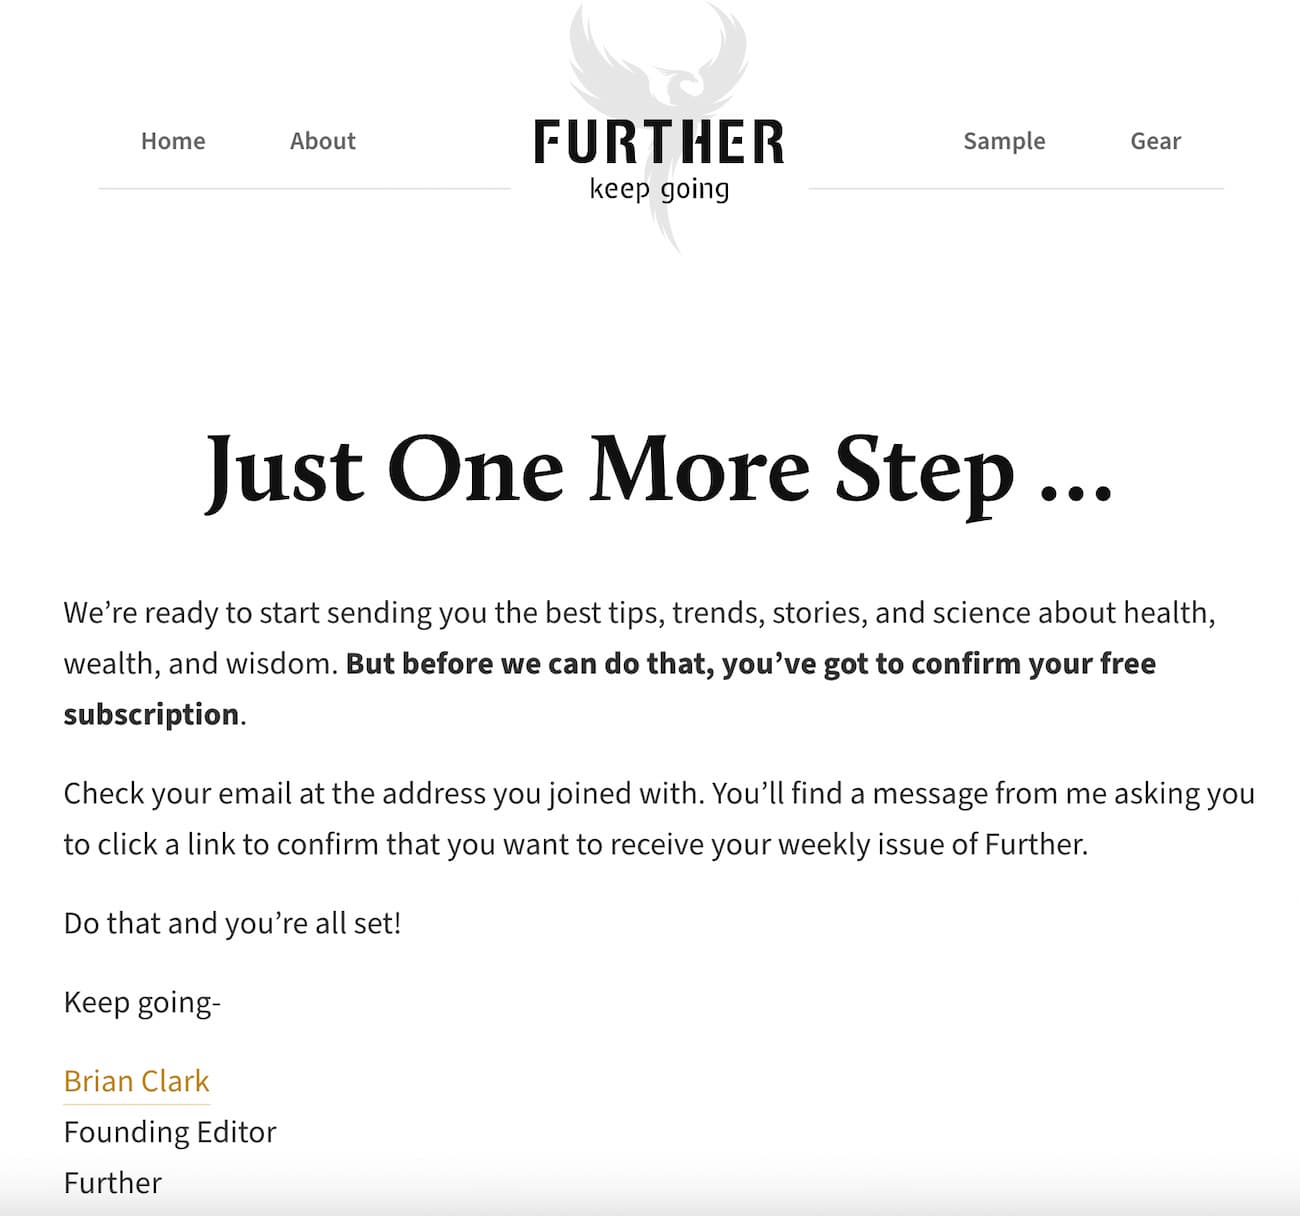 Thank you page informing users about the need to confirm their subscription
Step 2. They receive a confirmation that contains a single link that verifies their submission. If they successfully click it, they get added to your list. If they fail to click it, they’re not added to your list.
Here’s what the confirmation email from Further looks like:
 Confirmation email from Further
Thanks to this, even if someones makes a typo or provides you with a fake email address, it won’t affect your email program’s success. That’s because such users will never click on the verification link and therefore won’t be getting your future communication.
While confirmed opt-in helps you build a healthy list, there’s also another benefit to it – it gives the Internet Services Providers (ISPs) like Gmail or Yahoo! a signal that you’re a solid sender and that your messages are legit. In other words, it helps you build a strong sender reputation, improves your email deliverability, and helps your messages stay away from spam folders.
Pro tip: Some email marketers worry that their subscription rate will decrease if they implement confirmed opt-in. While that’s likely and we’ve ourselves experienced this in the past, there are a few ways to increase the percentage of people who successfully click the verification link in your email.
First of all, throughout your landing pages, signup forms, and thank you page you should emphasize that users need to take an extra step if they want to join your list.
Secondly, you can provide guidelines about what the confirmation email looks like (e.g. sender name, subject line) or where the users should be looking for it (e.g. if it lands in the spam folder).
Last but not least, you can provide an instant benefit to your audience that can only be accessed if they verify their email address. For example, this could be a discount code or an ebook download link sent via email (instead of providing it on your page).
3. Greet your new contacts with welcome emails
When new subscribers opt into your contact list, their engagement and interest in your brand are at the highest level.
After all, they’ve made a deliberate decision to fill out that form and provided you with their email address because you’ve caught their interest. And now they’re eagerly expecting your next move.
The best way to make a good impression on your new subscribers is to send them a stunning welcome email – or even a whole onboarding email sequence.
 Example of a well-designed and engaging welcome email from Magic Spoon.
Here’s what you can achieve through a good welcome email (series):
- Confirm to the new recipients that the subscription was processed well.
- Thank the new contacts for joining the list and entrusting you with their personal information.
- Set the tone for future communication and inform them about the frequency and topics you’ll be touching on.
- Deliver any content you’ve promised them in the signup form.
- Provide tips and useful links for the best way to start exploring your brand or website.
- Confirm the sender address they can expect to hear from you in the future, so that they add it to their safe sender list.
On top of that, since welcome emails get exceptionally high engagement rates (average open rates above 86% and click-throughs over 24% according to our Email Marketing Benchmarks study) they can positively affect your sender reputation in the Internet Service Providers’ (ISPs) like Gmail or Yahoo! eyes.
Pro tip: Setting up a welcome email is simple and considering its effectiveness, it’s a must-have for any business.
Using GetResponse Marketing Automation you can just pick a workflow template, decide which email list the workflow should work with, and then select your welcome message.
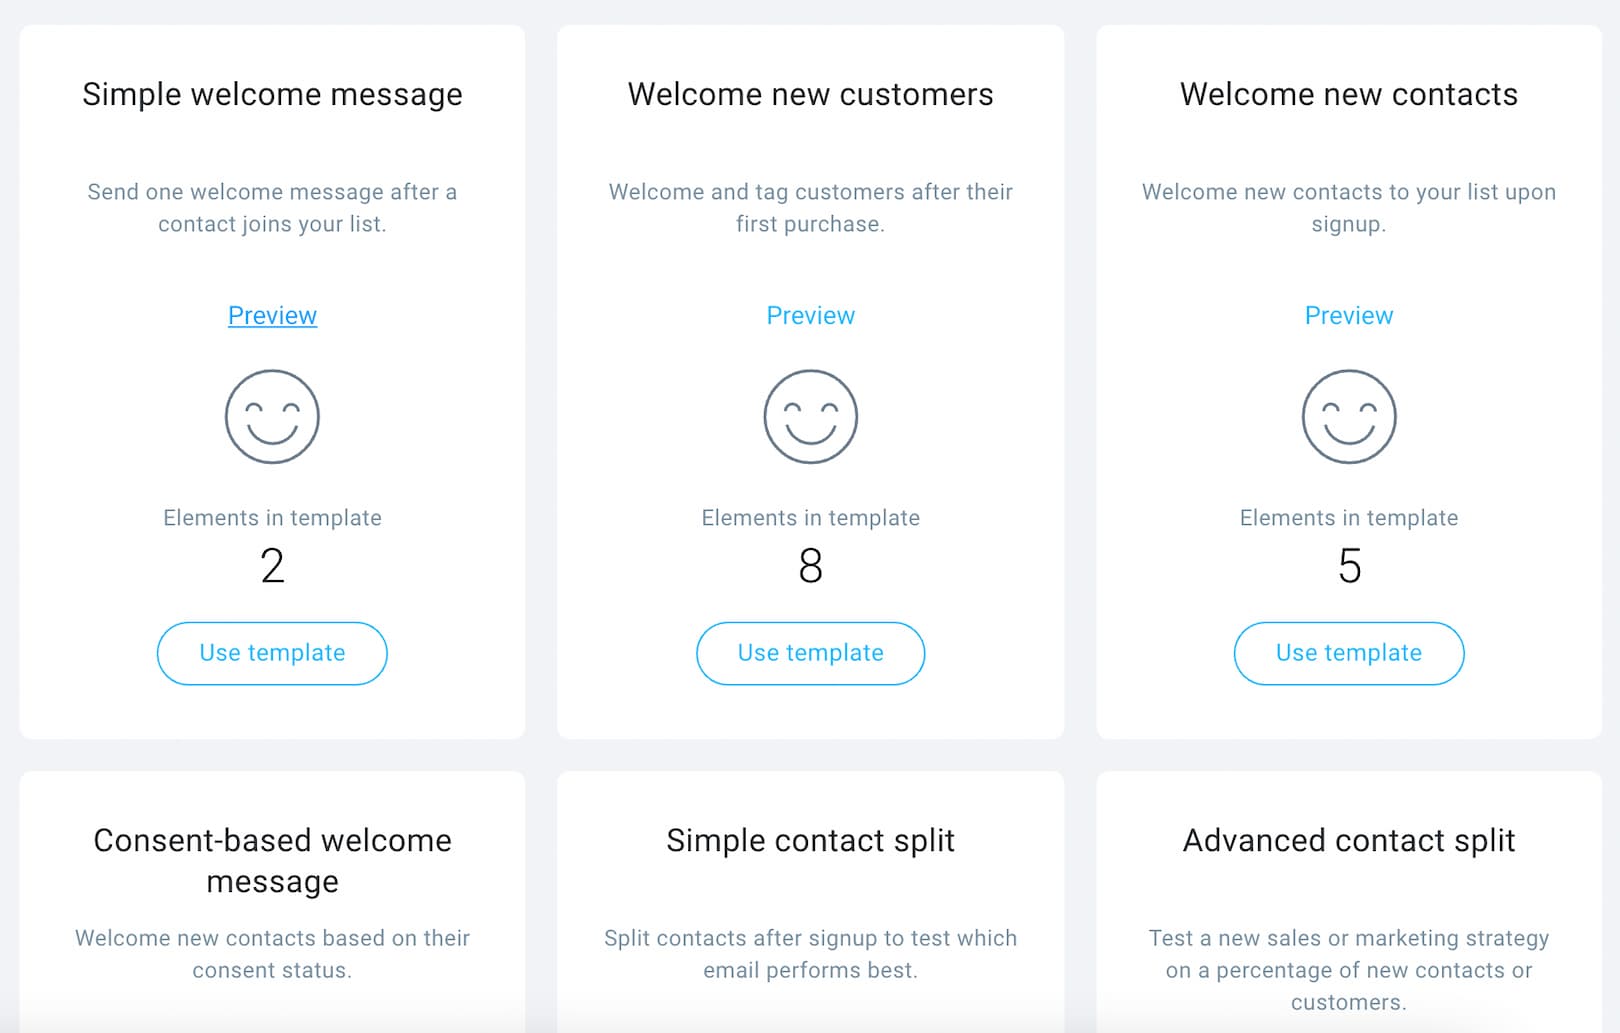 Marketing Automation Workflows library in GetResponse
 Simple welcome email workflow built with Marketing Automation
Building the welcome message itself is easy, too. All you need to do is pick one of the available email templates (or build one from scratch), fill out your copy, and customize the message to match your branding.
4. Master your tagging and segmentation
Other effective email list management techniques are tagging and segmentation.
Whether you’re dealing with new subscribers or those who’ve been on your list for many months, you’ll want to segment your audience to run more targeted campaigns and drive more engagement.
Most email marketing solutions have tools that allow filtering subscribers based on their personal attributes and behavior. And with this information, you can personalize emails for each subscriber. Subscription date, interests, gender, age, location, industry, and purchasing behavior are some of the main data or criteria commonly used for list segmentation.
 Contact card view in GetResponse displaying recipient’s tags and activity
But how do you segment your email list? Here’s how to do it inside GetResponse.
Step 1. Go to your list and specify the conditions you want to use to filter your contacts.
You could filter subscribers using their contact details (e.g. name, email, subscription date), contact actions (e.g. message opened, link clicked, webinar attended), geographic location, tags, ecommerce data, etc.
Here, for example, we’ve searched for all the people who’ve signed up to our list between the 1st and 10th of May 2021:
 Filtering contacts using date range condition in GetResponse
Step 2. Once you’ve specified the conditions, hit save and this will create a new segment for you.
Now, what’s useful is that segments are ‘dynamic’ as they’re based on conditions. So every time someone new matches the criteria you provided in the segment, they’ll be automatically added to it. The same applies if someone no longer matches your criteria, i.e. they’ll be removed from the segment.
Pro tip: One neat way to use the fact that segments are ‘dynamic’ is to create several segments based on user engagement in your communication. This will help target individual subgroups with tailored content and varying communication frequency.
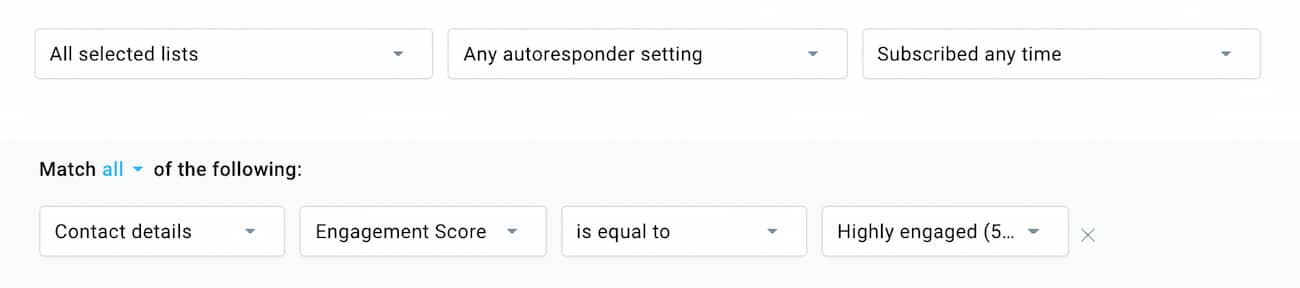 How to create a segment using the Engagement Score feature
 Creating segments ahead of time using Engagement Score feature
You could also use Marketing Automation to add contact tags to segment your subscribers based on events and actions within your workflow. Say you wanted to tag everyone who entered your email list but didn’t open your welcome email. All you need to do is set up a workflow and add an action that’ll tag your subscribers based on their action, like this:
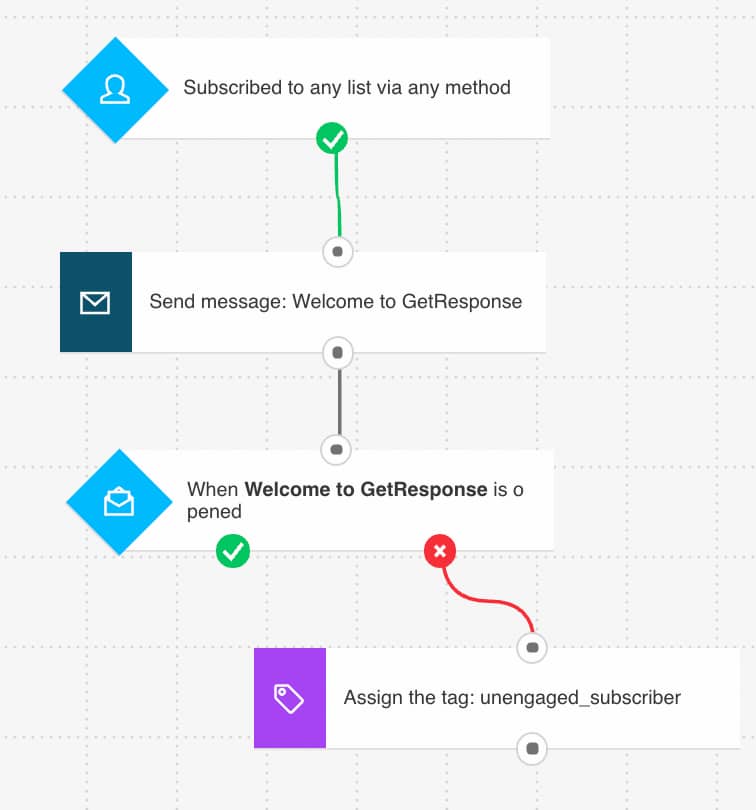 Extended welcome email workflow tagging users who don’t open the welcome message
And once you’ve tagged those who did or didn’t perform a particular action, you once again go to your list, search for contacts with a specific tag, and save that as a segment:
 Searching contacts based on the assigned tag
Thanks to this approach you can put your contact filtering on autopilot and have your email recipients added to relevant segments automatically.
5. Reactivate unengaged subscribers
Do you have unengaged subscribers? You know, people who haven’t opened any of your emails or didn’t click any of the links in, say, 90 days?
Typically, this unengagement stems from:
- People ignored several of your emails and the ISP started filtering your messages into the spam folder.
- People are no longer interested in a given category or already bought a product that serves their needs.
- People have moved to another location or changed jobs and your offer’s no longer relevant or even reaching them.
It’s natural and you shouldn’t be upset that this happens. However, you shouldn’t just ignore it and continue targeting your audience in the hope they’ll suddenly become interested or engaged.
You should be aware that ISPS pay a lot of attention to how engaged their users are with your content. If a significant number of your recipients show no interest, a large share of your emails will be either delivered to the junk folder, or not at all.
Therefore, what you should do is make sure that you regularly reengage your unengaged subscribers either through manually sent campaigns or, better yet, automated sequences.
Here’s an example of a marketing automation workflow inside GetResponse that’d help you run this type of campaign on autopilot:
 Reengagement marketing automation workflow
Note: In this workflow, we’ve used a segment that includes people who’ve been on our list for more than 180 days and have been recognized by our system as unengaged (their engagement score was -3).
 Unengaged subscribers who’ve been on the list for more than 180 days
And as an inspiration, here’s an example of reengagement campaign sent by MVMT to the subscribers who’ve become unengaged:
 Reengagement email campaign from online retailer MVMT
6. Automatically remove unengaged subscribers
Now, there are also times when re-engagement campaigns don’t succeed.
What should you do then? Ideally, after a couple of failed attempts, you’d either suppress these contacts from your future mailings or remove them from your list altogether.
While this may seem like a drastic approach, especially for small businesses where every lead counts, but you should consider just how much bad deliverability could affect your bottom line. It’s almost always less expensive to attract new contacts who’d be happy to do business with you.
So how do you do this? There are two ways to carry out this process – the manual way and the automated way.
The manual way requires that you search for these contacts just the way you’d do when setting up segments. For example, here we’ve looked for contacts who haven’t opened any of our emails in the last 180 days, and have been on our list for more than 180 days.
 Contacts who’ve not opened any of our emails in the last 180 days
Note: This only works if when adding new contacts to your list, you assign them an Autoresponder day with a “0” value.
Once we’ve found this segment and failed to re-engage them, all we need to do is select them all and click the action – “Delete from list”.
Now, the automated way requires a workflow. It could be a standalone workflow or just an addon to your re-engagement workflow we created in the previous step. Here’s what this could look like:
 Removing contacts from the list through a Marketing Automation workflow
This process is much easier especially if you have a big scale, but it can also backfire, so be careful. You don’t want to set your workflow conditions too strictly, as it may turn out that you’ll remove more contacts than you’re acquiring through your lead generation efforts.
7. In every email, remind subscribers they opted into your email list
The average email subscriber on your contact list receives 416 emails per month from other lists they’re subscribed to. So you can imagine how easy it can be for them to forget they even signed up to receive your emails.
And if they don’t remember they subscribed, chances are they’ll stop engaging with your content or even worse, report your email as spam. This will damage your reputation with mailbox providers like Gmail, Yahoo Mail, etc.
This is where permission reminders come in. In every email you send, remind your subscribers that they chose to receive your emails by signing up on your website or landing page and that they can easily opt-out if they want to.
A permission reminder is a short, simple statement that reminds the reader who you are and how they ended up on your contact list. And they’re usually in the footer. Here’s a good example of a permission reminder from the New York Times:
 Permission reminder in the email footer
Regardless of where you are in the world, there are privacy laws that you must follow. For example, in Canada, there is the Canadian Anti-Spam Legislation (CASL). In the United States, there’s the CAN-SPAM Act, and in the European Union (EU), there is the General Data Protection Regulation (GDPR).
And these laws simply don’t tolerate spam and require you to have explicit permission to send marketing communication to your contacts. So if your subscriber forgets they opted into your list and chooses to mark your email as spam, you could get penalized.
Although, once you’ve gained initial consent to send emails, you’re not required by law to include permission reminders. But adding them to your emails will help you ensure compliance, boosting your deliverability rate and your subscribers’ confidence in you.
8. Automatically remove bounced email addresses
There are two types of bounces – soft and hard bounces.
The soft ones are usually temporary and mean that a mailbox couldn’t be reached at a particular moment, e.g. because the mailbox is full. The hard bounces, on the other hand, are permanent. They mean that the email address is unreachable because it’s e.g. non-existent or invalid.
Even though soft bounces don’t always mean trouble, they may be an indicator of a wider issue. And as a reputable sender, you don’t want to have high bounce rates – no matter if your bounces are hard or soft. That’s because high bounce rates show to the ISPs that your email list management practices are not up to the standard.
And what could ISPs do if they see that you’re acting like that? They could postpone your email delivery, temporarily block your delivery, or block you permanently until you’ve made changes to your practices.
Now, if you’re using email marketing software, in most cases you don’t need to worry about bounce handling. Tools like GetResponse manage bounces automatically and remove contacts who cause a hard bounce after two attempts, and those who return a soft bounce after four attempts (in some specific situations, like mailbox full, after 30 days).
On top of managing bounces for you automatically, GetResponse also provides you with real-time analytics through which you can see how your email marketing campaign is performing. One particular report shows you in-depth information on your bounce rate and breaks down the types of bounces that were returned in your send-out.
Pro tip: If you’re using a CRM tool along with your email marketing solution, you’ll want to make sure that these are automatically synced. Should contacts opt out or be removed automatically from your email marketing software, you’ll want the same to happen inside your main database inside the CRM.
9. Use a scoring system to gauge engagement
When you use a scoring system to gauge the engagement of each subscriber on your email list, you’ll be able to measure their rates of engagement.
If your email marketing software lets you do this, it’s a goldmine.
For instance, in GetResponse, you can allocate individual scores (say, 10 points) to each contact or subscriber that performs certain functions. In the same way, you can deduct points from their engagement scores when they don’t take certain actions set by you.
 Adding and removing scoring points based on contact activity in Marketing Automation.
So higher scores equal healthier and happier subscribers or customers.
And when you combine a scoring system with automation workflows, you can:
- Assign points to selected activities and behaviors.
- Assign points to users with particular attributes (e.g. not using a free email domain)
- Build reward programs for the most valuable subscribers.
- Use scores reflecting engagement and value as you refine individual subscriber profiles.
- Create early warning systems to trigger the result of declining engagement.
Insider tip: Use the GetResponse help center as your Score action guide.
10. Send personalized email sequences based on your scoring system
Assuming you’ve set your email software to give subscribers ten points for each activity they perform, you can trigger certain emails to be sent to them since they’re engaged and responding to your campaigns.
For instance, you can set up a scenario like this in your email automation software:
 Marketing automation workflow with three follow ups checking if the user visited the check out page
When a subscriber gets at least 40 scoring points > send them an email persuading them to buy your online course. If they don’t buy the course or reply to your email in two days > send them a follow up email. If they don’t reply in another two days > send another follow up email. If they still don’t buy > don’t send any more emails and subtract their scoring points.
Sending emails to your subscribers based on their engagement scores will further help you send emails to the right people and at the right time. And this will increase your engagement and conversion rates.
11. Use A/B testing to determine what works
If you’ve been doing marketing for any amount of time, you’re probably familiar with how A/B testing works. But if not, A/B testing or split testing is an experiment where you create two (or more) variations of the same campaign to see which one works best.
At the end of your experiment, the variation that wins becomes what you keep working with to get the best results.
With A/B testing experiments, you can measure the performance of your emails to determine which is most effective. And here are some examples of elements to compare:
- Subject lines
- Headers
- Hero shots
- Main offer
- Length of emails
- How color affects your conversions
- Layout styles
- Headlines and content
- Images and videos
- Navigation elements
The more you run testing, the better you’ll understand your target audience and the better your deliverability, engagement, and conversion rates will become.
GetResponse has an entire section dedicated solely to A/B tests. Creating beautiful messages is a breeze with our state-of-the-art editor.
If you’re interested, here’s what the AB test configuration looks like inside our tool.
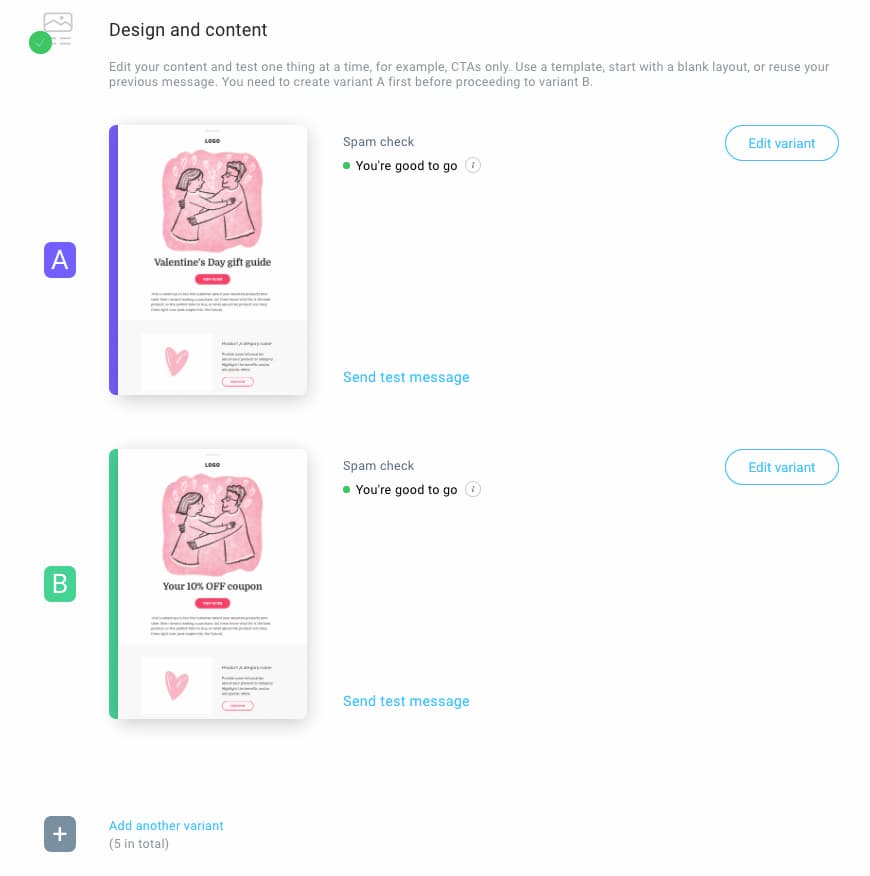 Split testing functionality allowing you experiment with your email campaigns
 Split testing experiment configuration – choosing your audience size
Heads up, you can choose to have the winning design be sent out automatically to the rest of your audience. This will save you time and help you launch your email campaigns more efficiently.
12. Switch email service providers (ESP)
Sometimes, it doesn’t matter how many email list management best practices you use, switching email service providers may be your best bet.
One of the biggest reasons to switch is deliverability. If your deliverability rates are low, you can try some best practices to bump it back up. But if regardless of anything you try, your rates still remain low, then you should consider switching your email service provider.
Naturally, when moving between providers, you’ll want to make sure that you migrate the essential information like:
- your email templates,
- contacts along with contact tags and other personal attributes,
- segments and suppression lists,
- forms and landing pages,
- automation workflows.
On the other hand, you’re better off if you skip these during your migration:
- contacts who unsubscribed from your lists,
- contacts who bounced and should have been removed,
- contacts who reported your emails as spam.
And if you’re ever considering switching to GetResponse, it’s easy to migrate contacts from your current provider into your GetResponse list. You can add thousands of contacts along with their custom fields within minutes.
Improve your email marketing through email list management
Email list management is an essential part of any email marketing strategy. And with it, you will increase your ROI and improve your contact list quality over its quantity.
Good thing you have this guide for free. Now, go on, use what we’ve shared here to get your email list organized. Keep sending relevant and personalized email campaigns to your subscribers! The improvement in the bottom line will make all your email marketing efforts worth it!
And if you’re considering switching to a new email marketing provider, you’re welcome to test GetResponse for 30 days completely free. Equipped with our tools, you’ll find email list management easy and enjoyable.
Grab this infographic and stay on track
Want to save this information for later? Grab our free infographic highlighting the methods we’ve described in this article and use it to stay on track with your email marketing campaigns.
To download the infographic in full resolution, head over to our GetResponse Resources here or click on the infographic directly.
 12 Email List Management Best Practices – Infographic. Click the image to view the infographic in full resolution.