
No products in the cart.
Healing
How to Install Insomnia Kodi Addon on FireStick
05
Aug
Aug
In this post, you will find the step-by-step instructions to install the Insomnia Kodi Addon on FireStick.
The steps also work on other Kodi-compatible devices, including Android TV, PC, Mac, Android Mobiles, iOS, Raspberry Pi, and more.
What is Insomnia Kodi Addon
Insomnia is a third-party Kodi addon for on-demand films and shows.
You can install this addon from the unofficial Kodi repository called Offspring Repo.
In addition to movies and episodes, this addon also lets you watch documentaries.
You can explore the content by genre, year, artist, awards, and popularity.
Insomnia supports Real Debrid and Trakt.
This addon is now part of our collection of Best Addons for Kodi.
Attention, FireStick Users!
Governments and ISPs constantly monitor your online activity, and accessing copyrighted content on your Fire TV Stick could lead to serious trouble. Currently, your IP is visible to everyone. I strongly recommend getting the best FireStick VPN to mask your IP address and securely stream your favorites.
I personally use ExpressVPN, the fastest and most secure VPN available. Not only is it easy to install on any device, it comes with a risk-free 30-day money-back guarantee. Plus, if you’re not 100% satisfied, you can always get a refund. ExpressVPN is currently also offering a whopping 3 extra months free on their annual plan!
Here are reasons why using a VPN at all times is essential.
Is Insomnia Addon Safe & Legal?
As I mentioned, Insomnia is available via a third-party repository, Offspring.
We cannot guarantee the safety of the addons that come from the unofficial Kodi repositories.
However, I have used this addon on some of my devices. I did not run into any safety trouble. Insomnia did not install any malicious software.
I scanned the repository through an online antivirus tool to be more confident. The tool did not raise any flags.
Therefore, I am assuming that the Insomnia addon is safe. I won’t mind using it.
Here is the proof:

Regarding the legality, we at FireStickTricks.com cannot confirm whether or not Insomnia has obtained the appropriate licenses to distribute the content.
I recommend using a Kodi VPN to avoid any legal troubles.
How to Install Insomnia Addon on Kodi
The installation of the Insomnia Kodi addon involves multiple steps.
To make the process more manageable, I have divided the steps into three parts.
Follow the steps below:
Legal Disclaimer: This tutorial is purely educational. FireStickTricks.com doesn’t own, host, operate, resell, or distribute any streaming apps, addons, IPTV or services. The page contains some unverified services, and we are not certain whether they hold legal licenses to distribute the content. FireStickTricks.com does not verify the legality of each app/service in all regions. Do your due diligence if you use any of the unverified apps/services, and stream only content that is available in the public domain. The end-user shall be solely responsible for the media accessed.
Part 1: Enable Unknown Sources
Insomnia addon is hosted on a third-party, unofficial Offspring repository.
To install such addons, you must give Kodi the appropriate permission.
Here is how you enable Unknown Sources:
1. Click Settings on the home screen of Kodi (in the top-left corner).

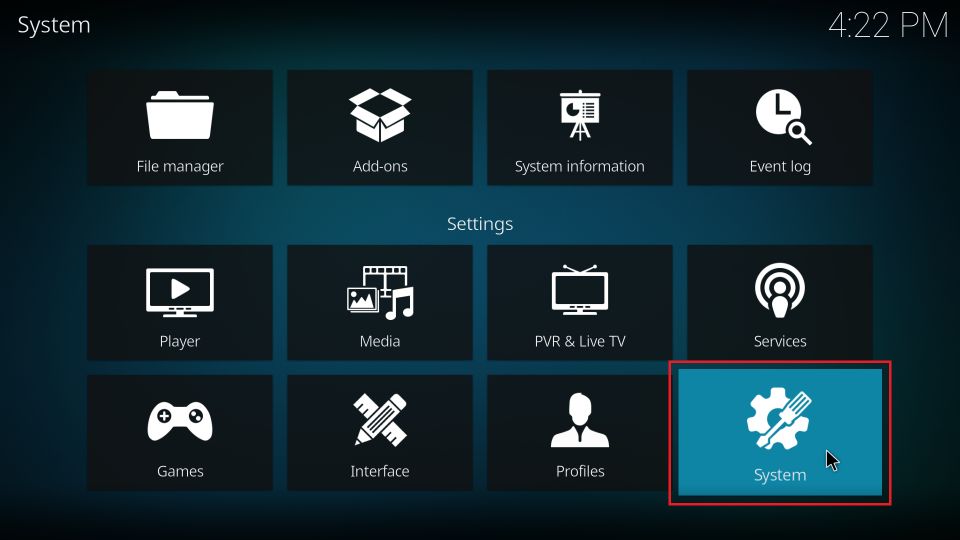
2. Click System on the following window.
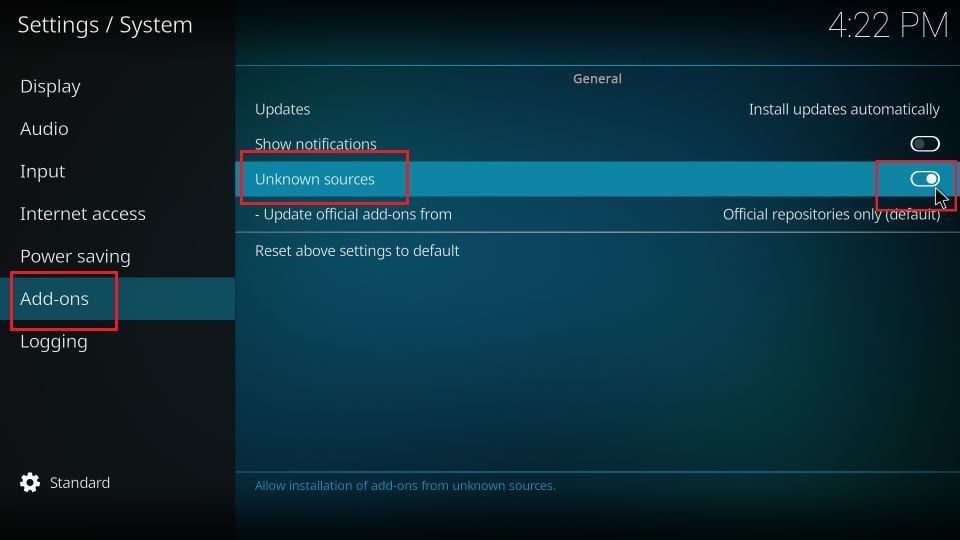
3. Select Add-ons in the menu on the left. Click the toggle for Unknown Sources on the right to turn it on.
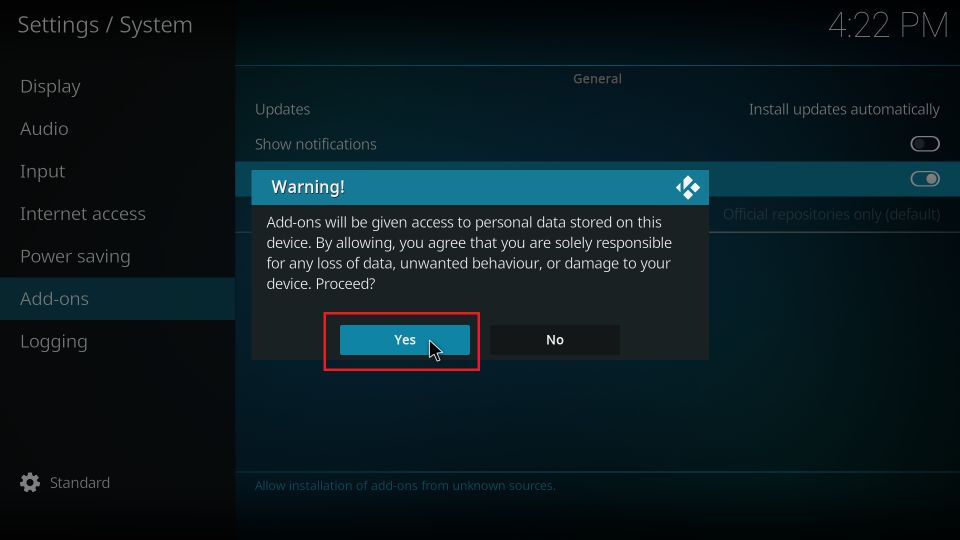
4. Click Yes on this prompt.
5. Click Update official add-ons from on the same screen.
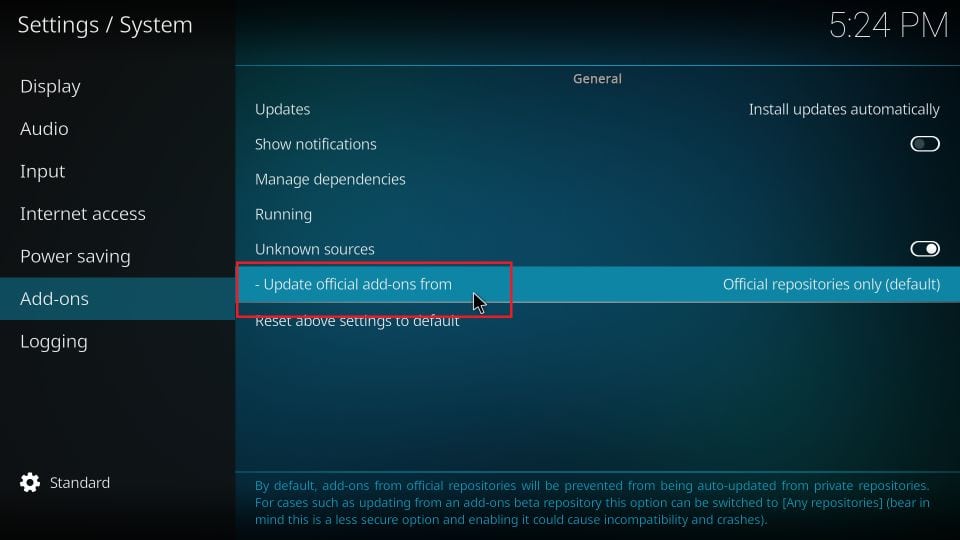
6. Click Any repositories on this prompt. This change allows Kodi to update third-party addons like Insomnia automatically.

You have successfully enabled Unknown Sources.
Part 2: Install Offspring Repository
As I mentioned, Insomnia is available via the Offspring repository. Therefore, we will install this repository now.
Follow the steps:
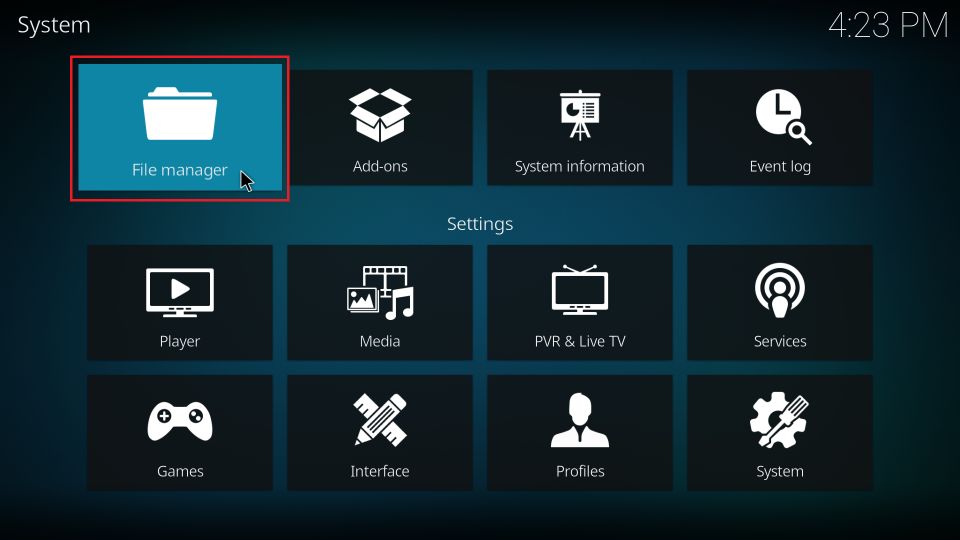
1. Click Settings again on the home screen of Kodi (top-left corner.)
2. Click File manager.
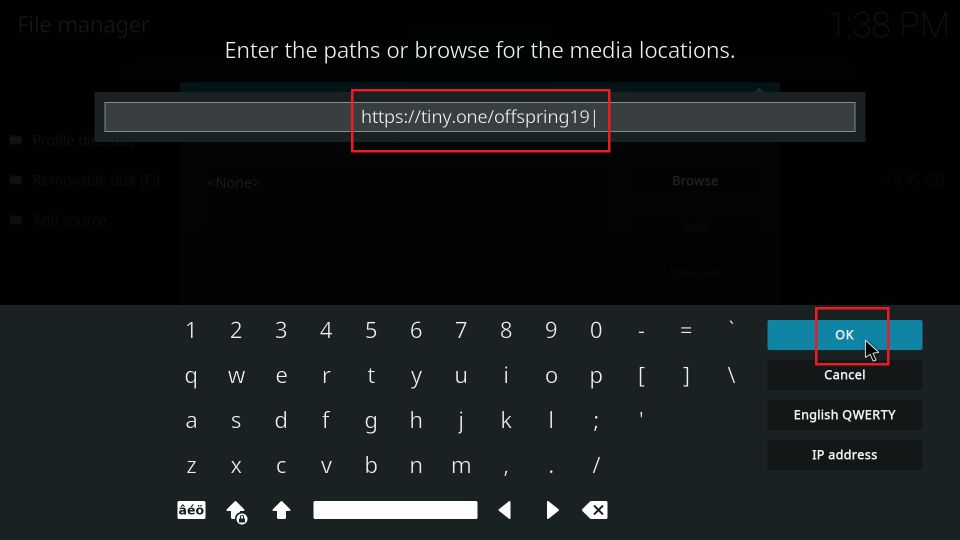
3. Click (or double-click on some devices) Add source.
Note: You may click Add source on either side.

4. Click
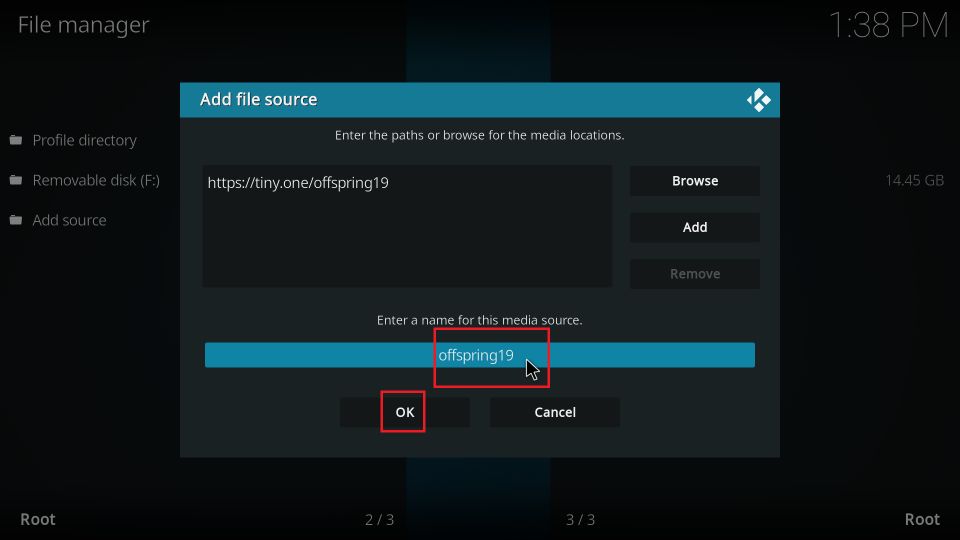
6. The input field Enter a name for this media source is auto-populated with the name offspring19.
I am keeping this name. If you choose a custom name, make it memorable. You will need it later. Click OK to continue.
7. Go back to the Kodi Settings window by pressing the back button once (or navigate from the Kodi home screen). Click Add-ons.

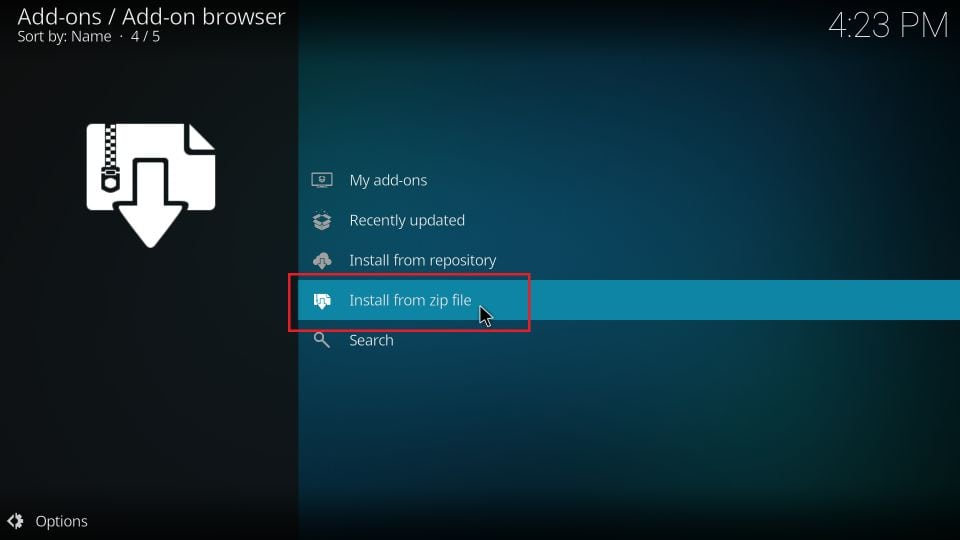
8. Choose Install from zip file.
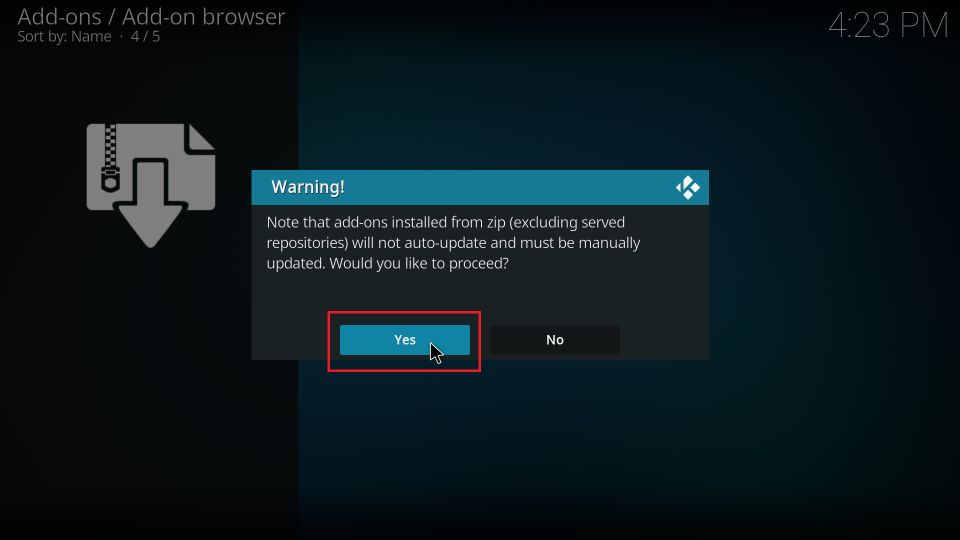
9. Click Yes when prompted.
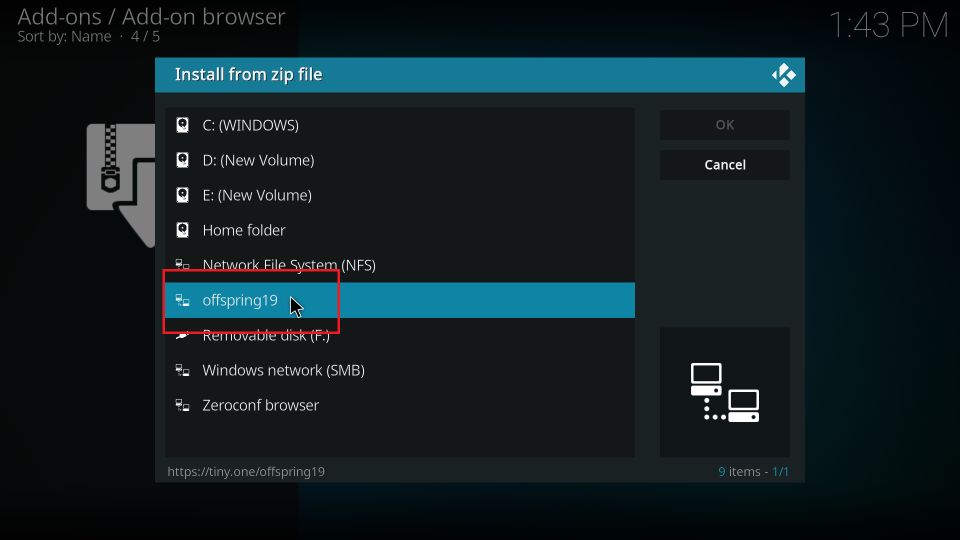
10. Click offspring19 or the custom name you provided earlier.
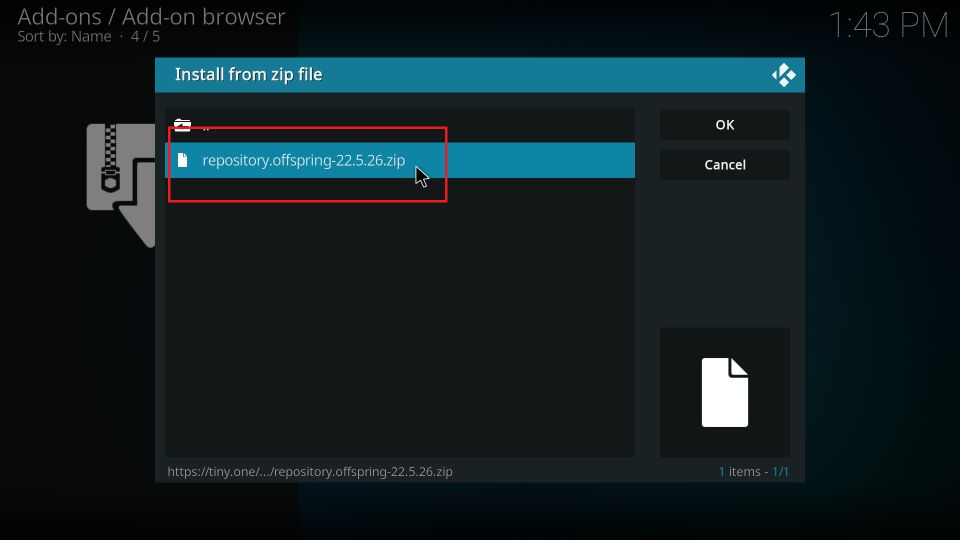
11. Click the zip file named repository.offpsring-x.x.x.zip.
12. You should see the notification offspring repo Add-on installed in the top-right area in a few seconds.
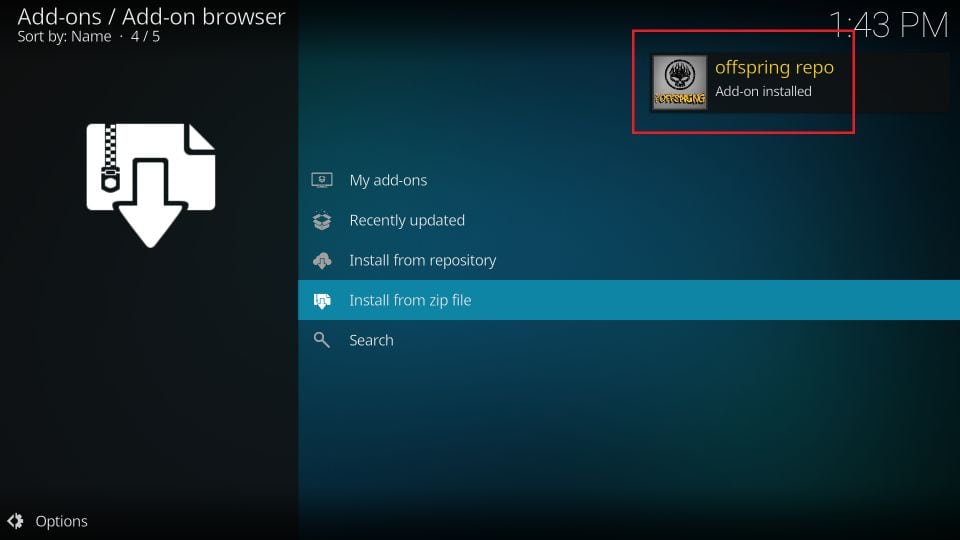
You have successfully installed the repository.
Part 3: Install Insomnia addon on Kodi
We will install the addon in this section from the Offspring Repo we installed in the previous section.
Follow the steps below:
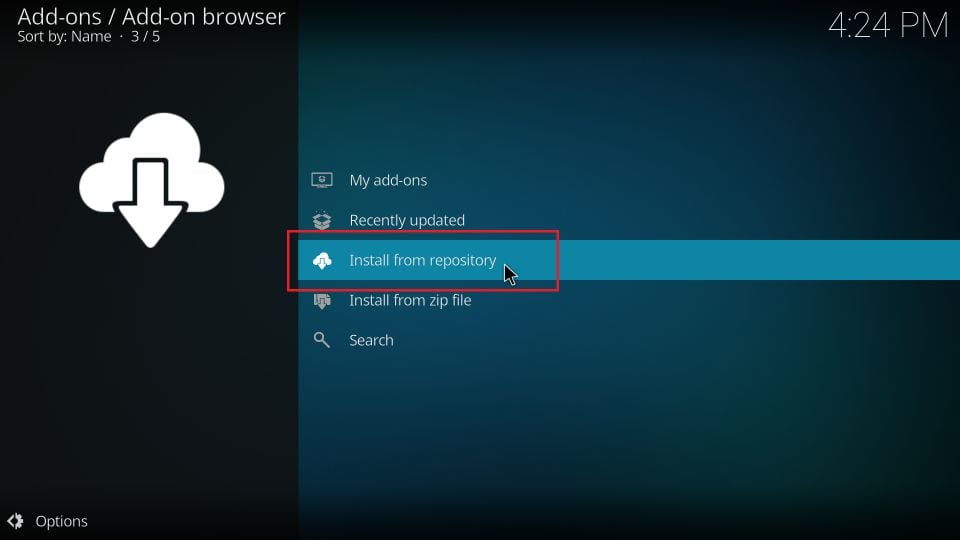
1. Go to Kodi Settings > Add-ons.
2. Click Install from repository.
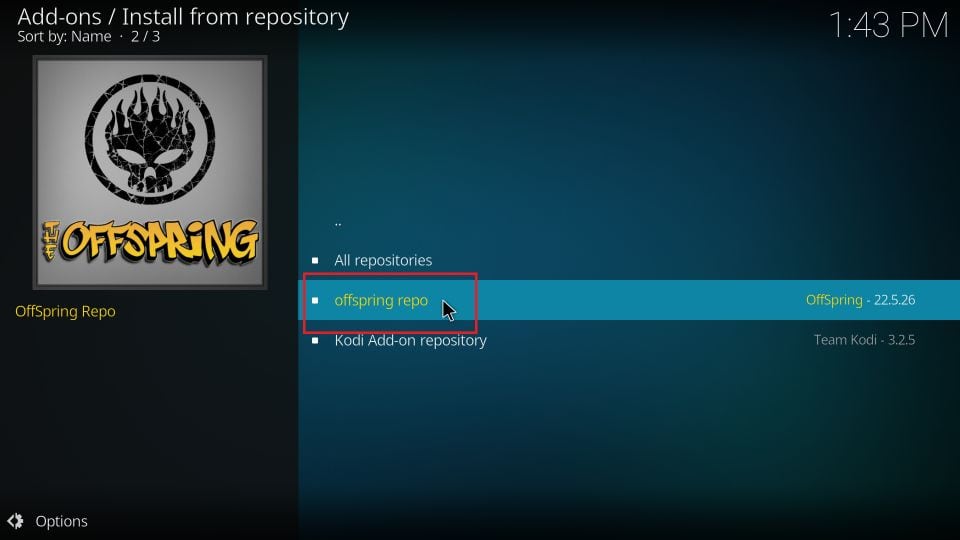
3. Open Offspring Repo on the next screen.
4. Click Video add-ons.
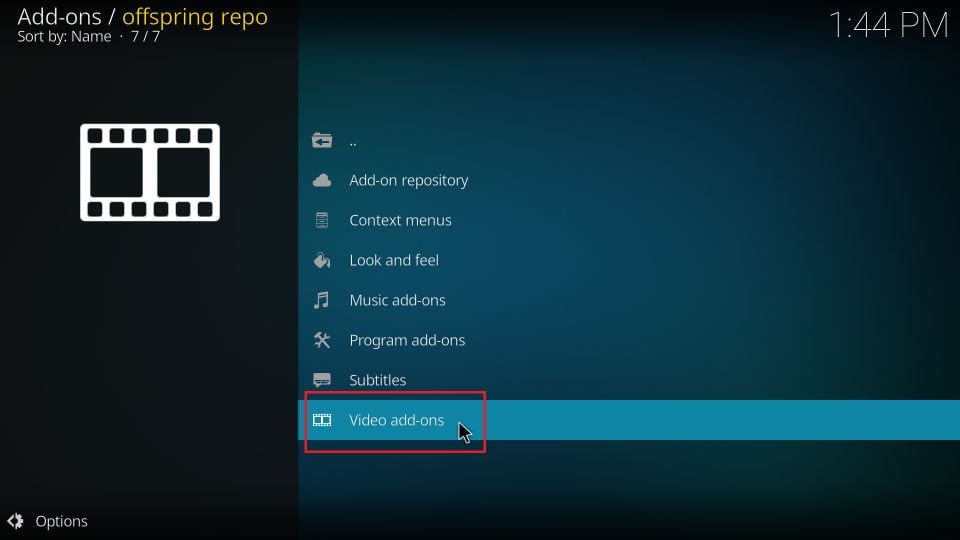
5. Click Insomnia addon.
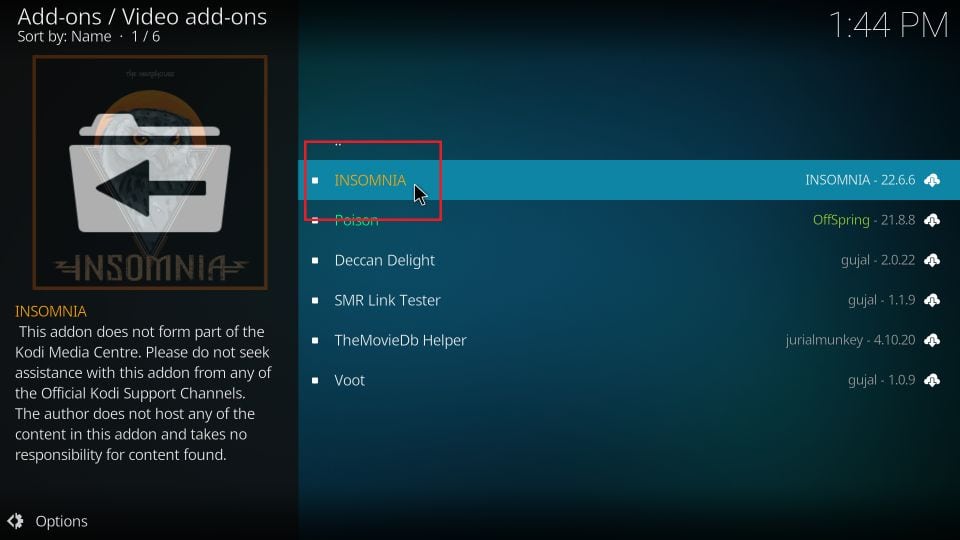
6. Click Install in the bottom-right area.

7. Click OK when this prompt appears.
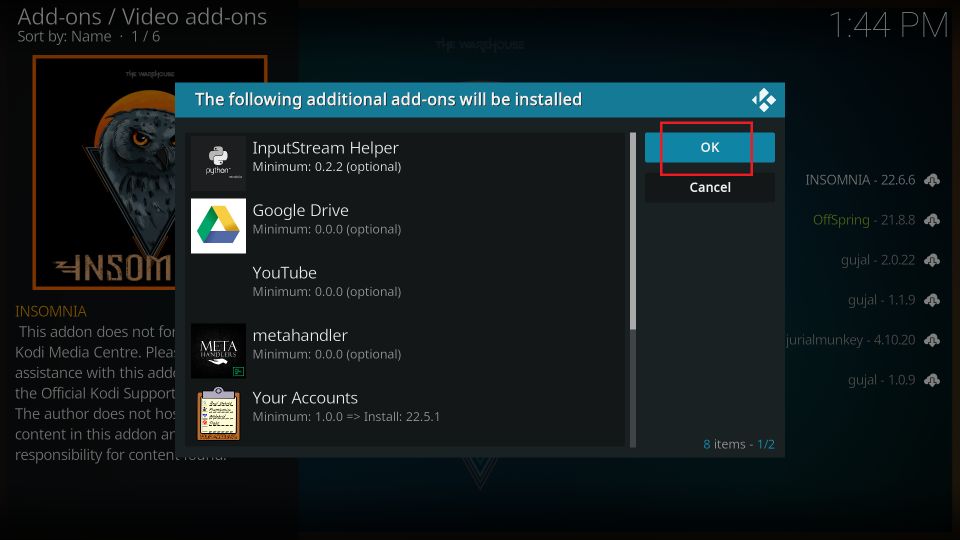
8. Wait for a couple of minutes. The notification Insomnia Add-on installed appears near the top-right corner.

You have successfully installed the Insomnia addon on Kodi.
Before you start streaming with Kodi Addons or Builds, I would like to warn you that everything you stream on Kodi is visible to your ISP and Government. This means, streaming copyrighted content (free movies, TV shows, live TV, and Sports) might get you into legal trouble.
Thankfully, there is a foolproof way to keep all your streaming activities hidden from your ISP and the Government. All you need is a good VPN for Kodi. A VPN will mask your original IP which is and will help you bypass Online Surveillance, ISP throttling, and content geo-restrictions.
I personally use and recommend ExpressVPN, which is the fastest and most secure VPN. It is compatible with all kinds of streaming apps and devices.
NOTE: We do not encourage the violation of copyright laws. But, what if you end up streaming content from an illegitimate source unintentionally? It is not always easy to tell the difference between a legit and illegal source.
So, before you start streaming on Kodi, here’s how to get VPN protection in 3 simple steps.
Step 1: Get the ExpressVPN subscription HERE. It comes with a 30-day money-back guarantee. Meaning, you can use it free for the first 30-days and if you are not satisfied with the performance (which is highly unlikely), you can ask for a full refund.
Step 2: Click HERE to download and install the ExpressVPN app on your streaming device. If you are using a FireStick, I have given the exact steps starting with Step 4 below.
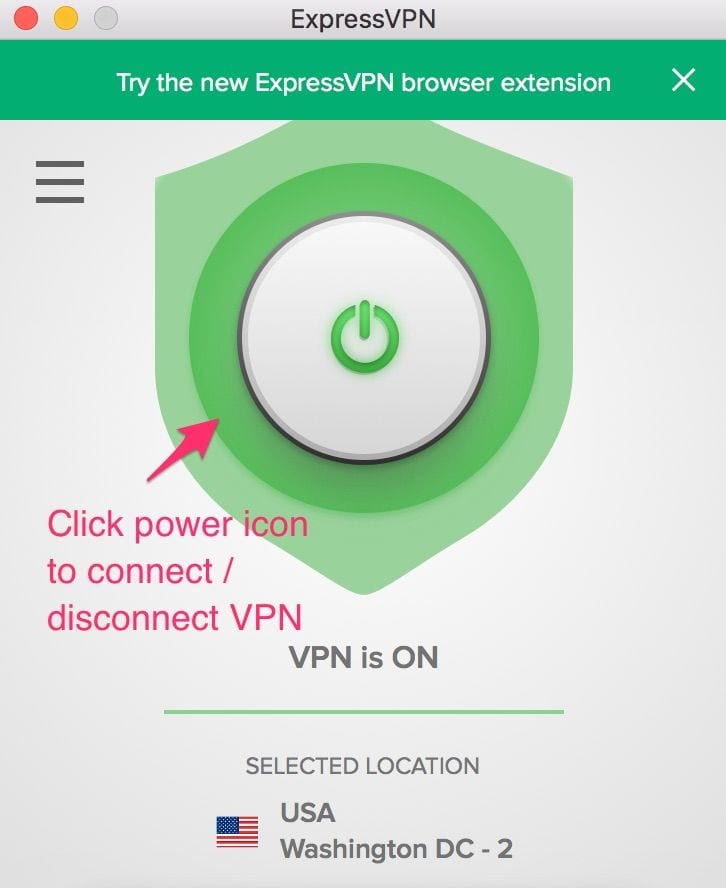
Step 3: Click the Power icon to connect to a VPN server. That’s all. Your connection is now secure with the fastest and best VPN for Kodi.
The following are the steps to install Kodi VPN on your Fire TV devices. If you have other streaming devices, follow Step 1-3 above.
Step 4: Subscribe to ExpressVPN HERE (if not subscribed already).
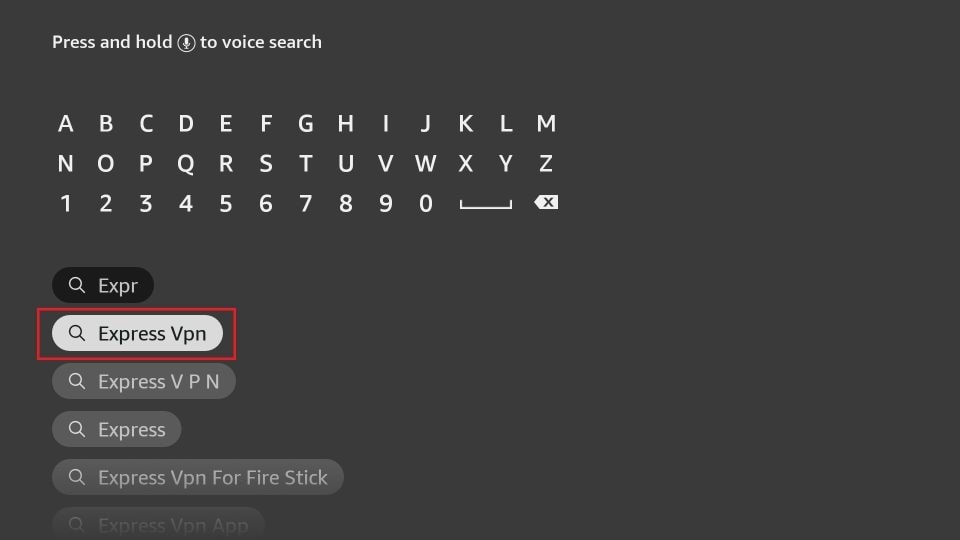
Step 5: Go to Fire TV Stick home screen. Click Find followed by Search option (see image below).
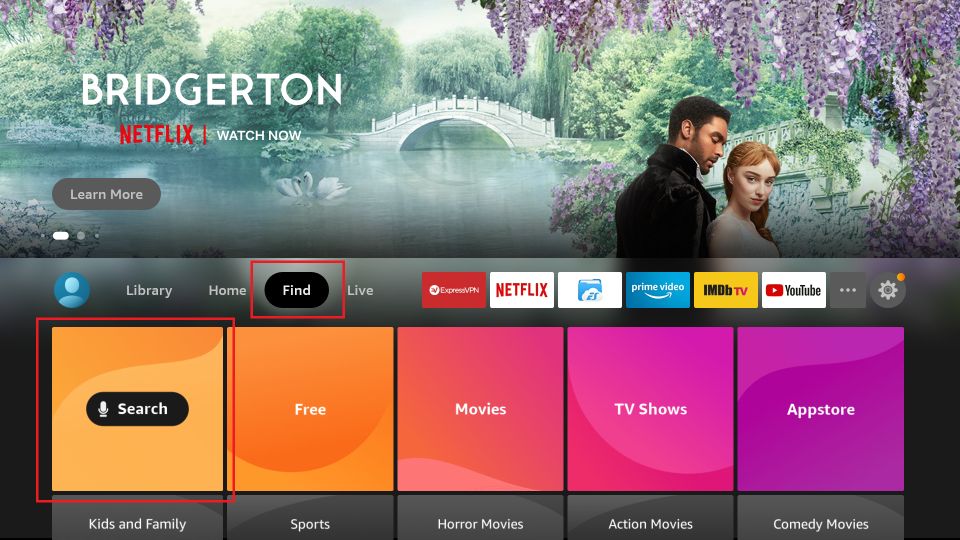
Step 6: Type Expressvpn in the search bar and select when it shows up.
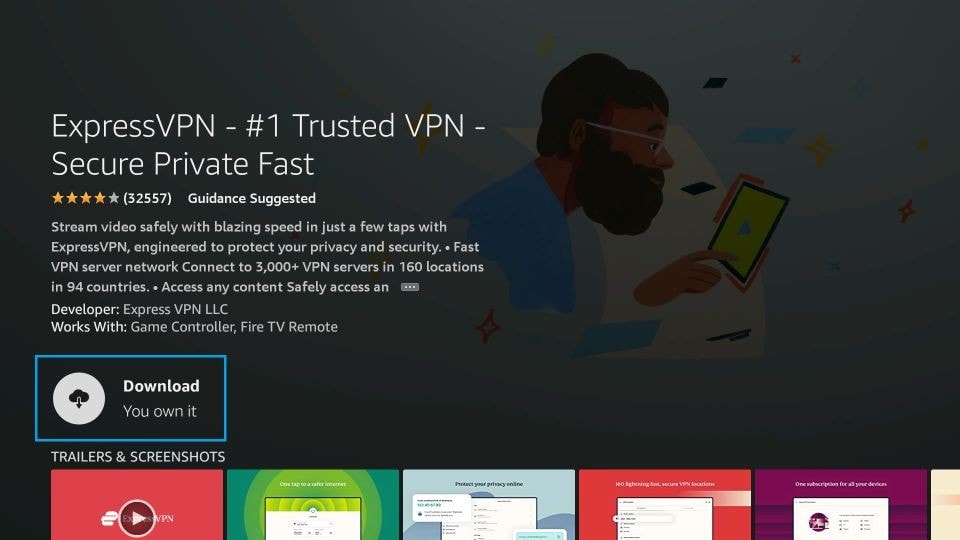
Step 7: Click Download.
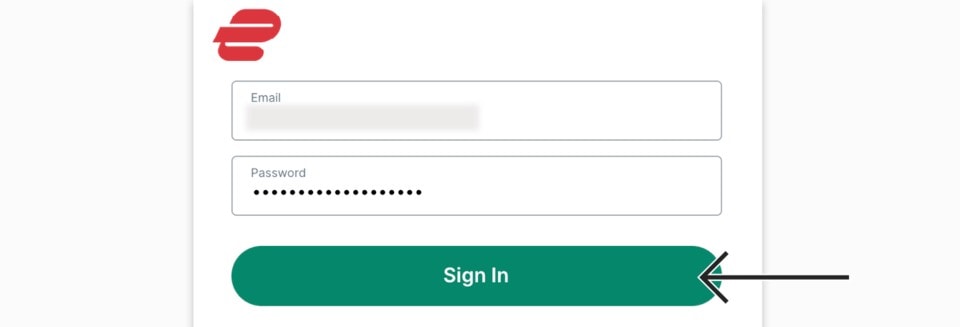
Step 8: Open the ExpressVPN app and Sign in using the email ID and password that you created while buying the ExpressVPN subscription.
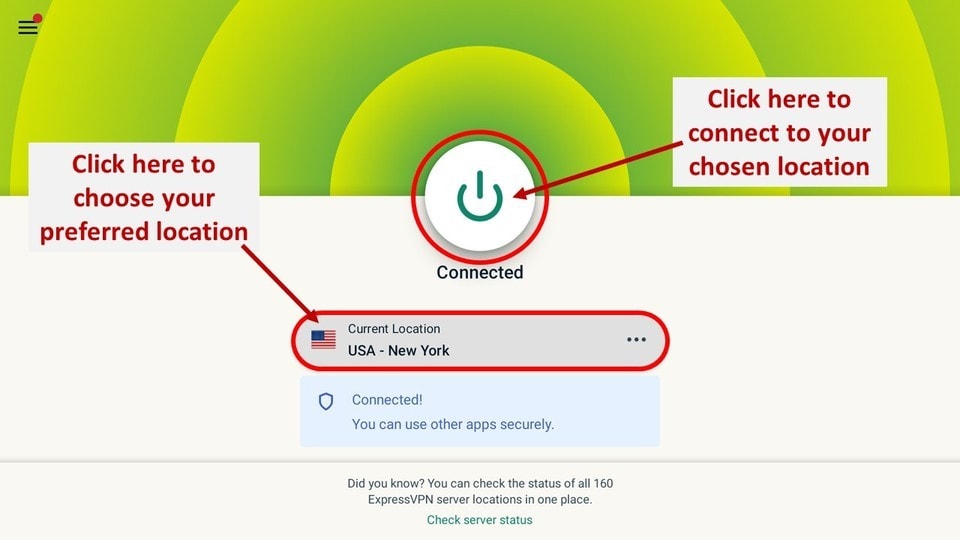
Step 9: Click the Power icon to connect to a VPN server. That’s all. Your FireStick is now secured with the fastest VPN.
How to use Insomnia addon on Kodi
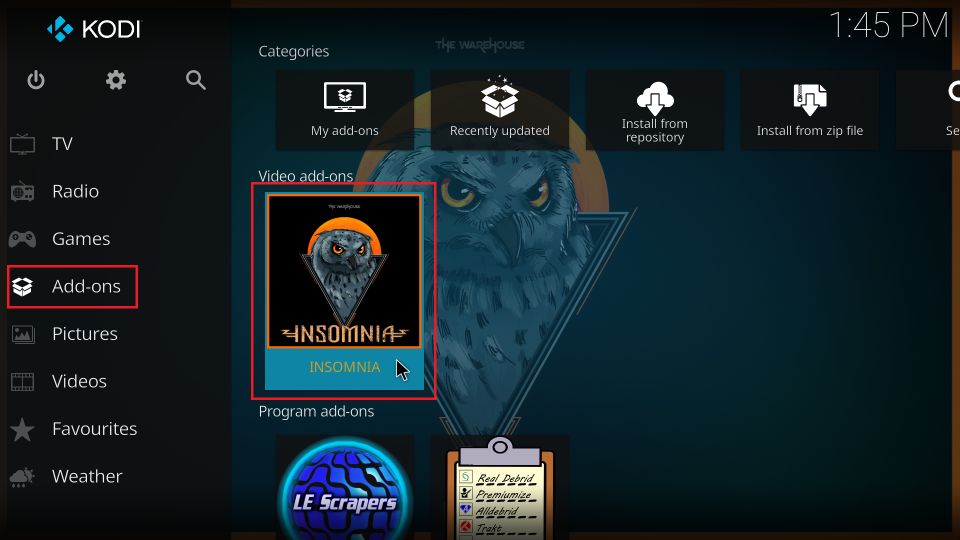
To access the Insomnia Kodi addon, go to the Kodi home screen.
Select Add-ons in the menu on the left. Click Insomnia on the right in the Video add-ons section.
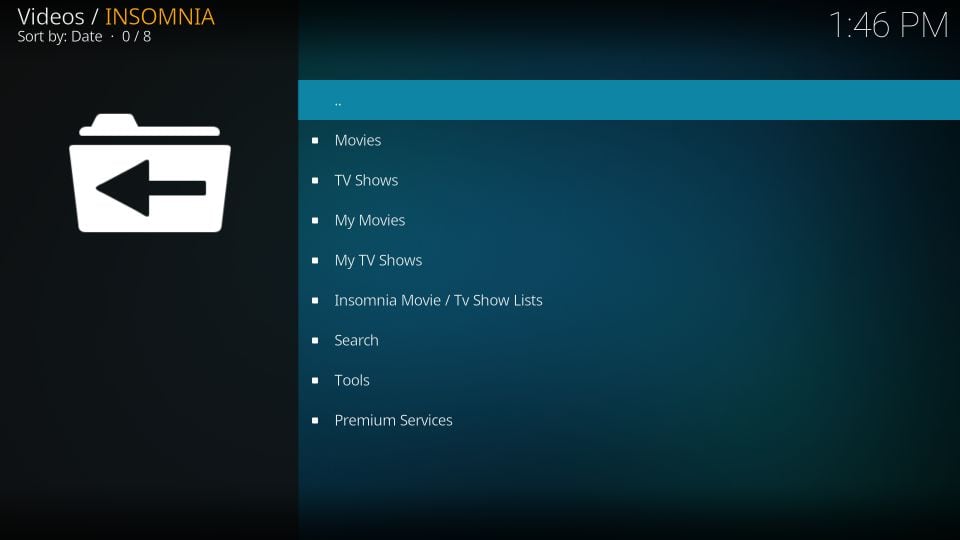
Press the back button if this prompt appears.

This is the main screen of the addon. It has simple categories, including Movies, TV Shows, My Movies, My TV Shows, Insomnia Movie/TV Show list, and more.
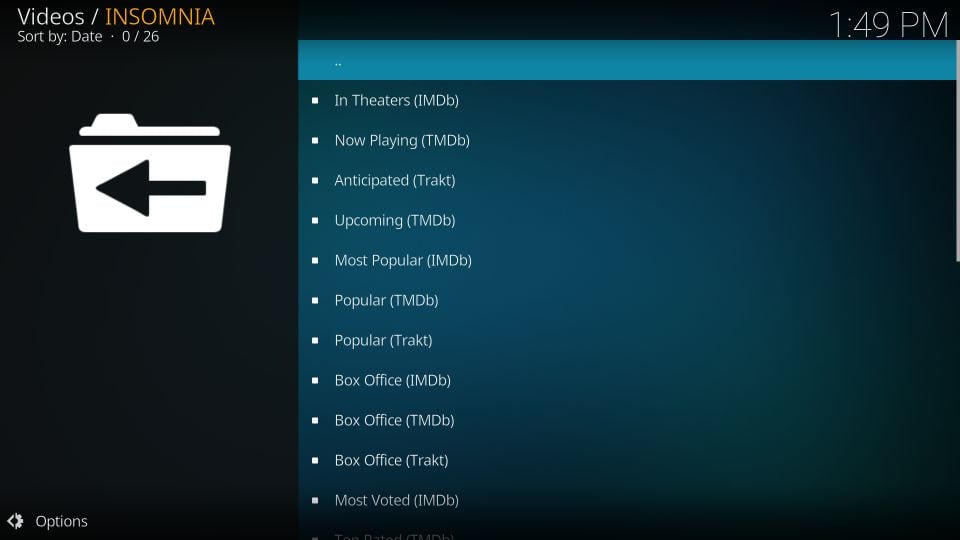
These categories on the main screen may have subcategories. For instance, when I clicked Movies, I found In Theaters (IMDB), Now Playing (TMDB), Anticipated, Upcoming, Most Popular, and other subcategories (image below):
You may start exploring the addon now.
How to Set Up Real Debrid with Insomnia Kodi Addon
Insomnia addon offers free links. However, if you sign in with Real Debrid, your streaming experience will enhance.
Real Debrid is a premium hoster. It offers higher-quality links and faster streaming.
If you don’t have a Real Debrid account, click here to get one.
Visit our Real Debrid with Kodi guide to know more about this premium service.
If you already have a Real Debrid subscription, follow these steps:
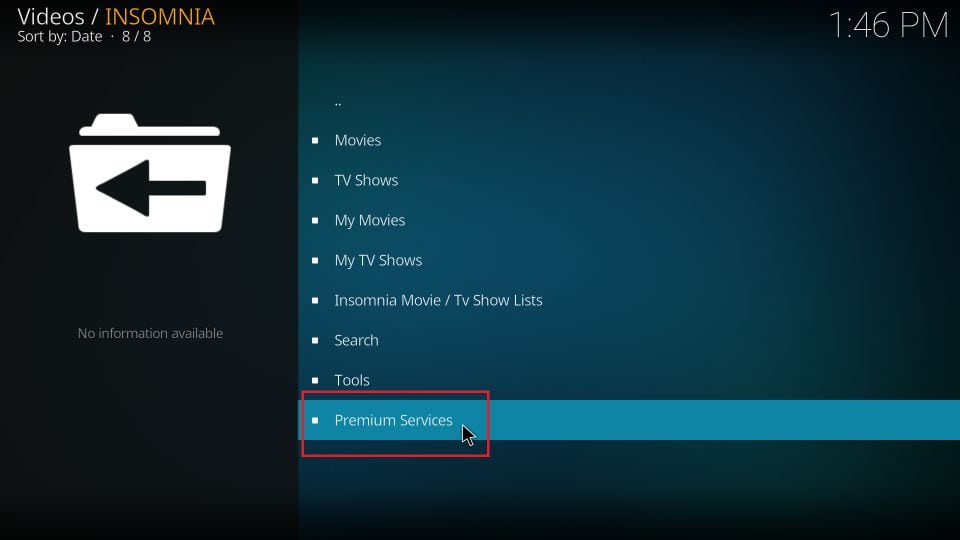
1. Click Premium Services on the main screen of the Insomnia Kodi addon.
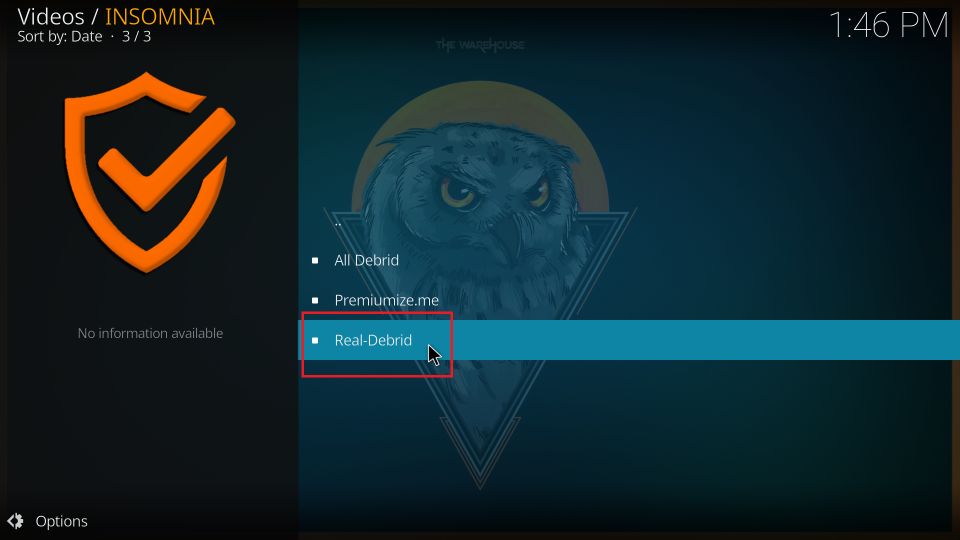
2. Click Real-Debrid.
Note: You may also use other premium hosters, such as All Debrid or Premiumize. However, based on the feedback of Kodi users, Real Debrid is the best.
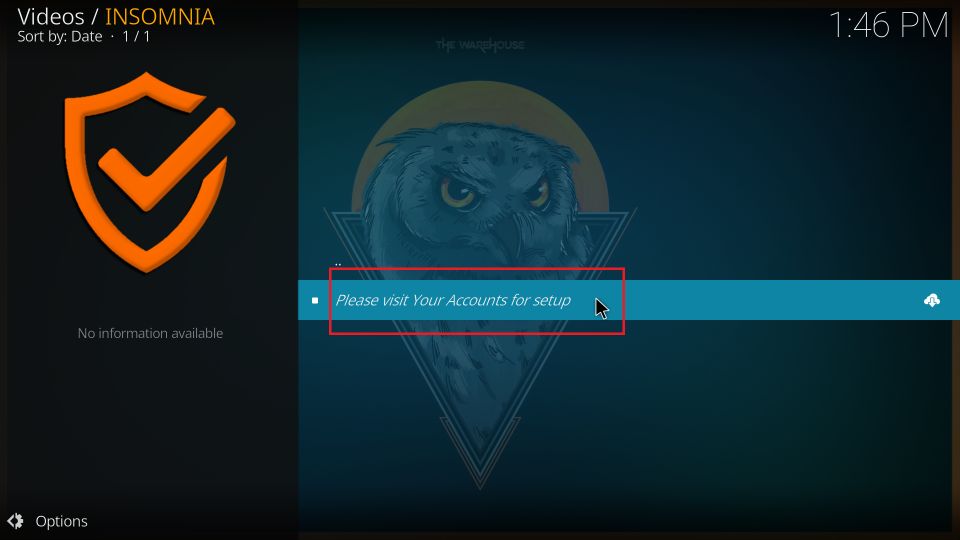
3. Click Please visit your accounts for setup.
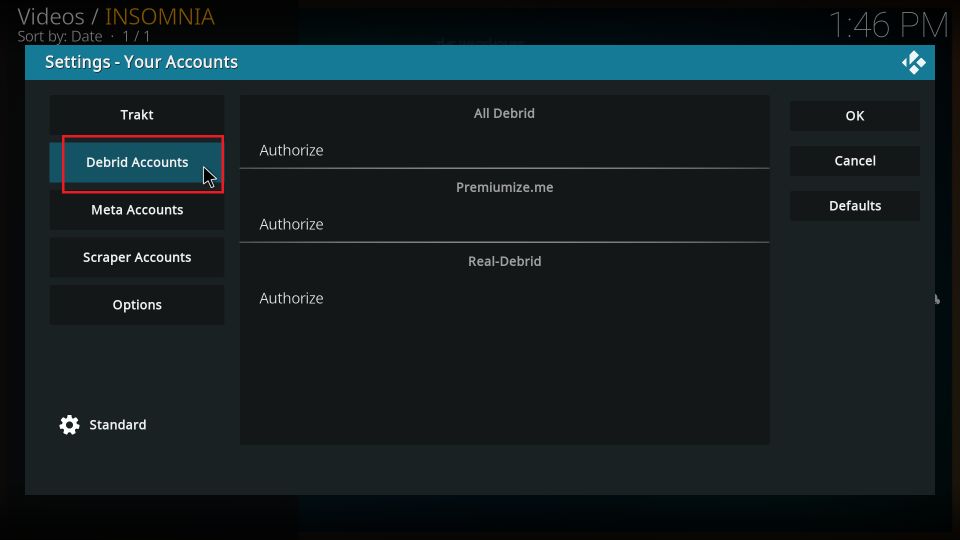
4. Click Debrid Accounts in the left menu on this popup.
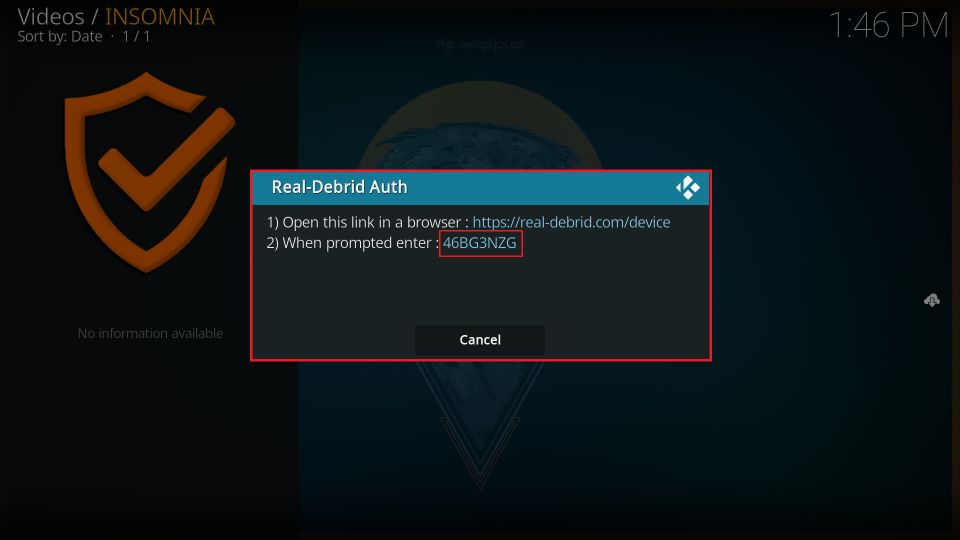
5. Click Authorize in the Real-Debrid section.
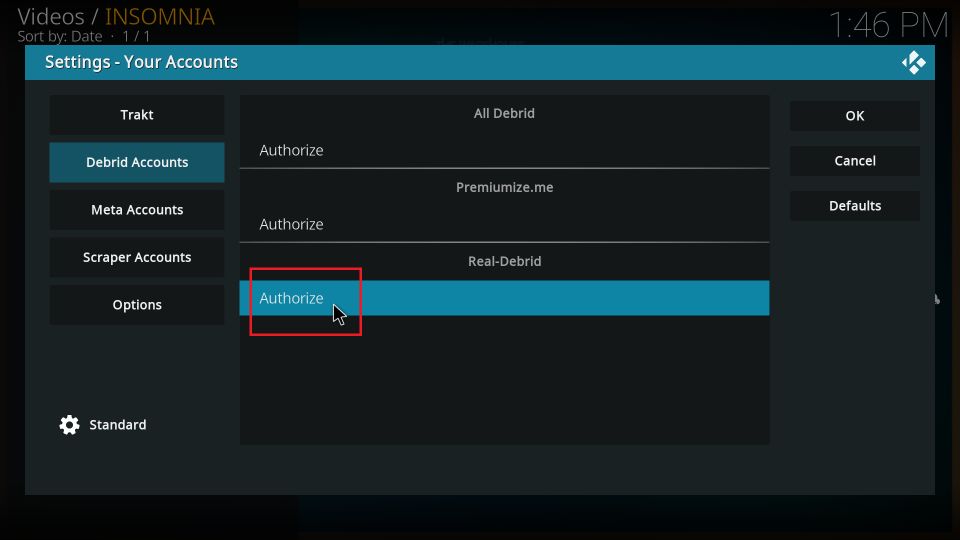
6. A prompt appears with the authorization code. Open real-debrid.com/device in a browser. Type this code.
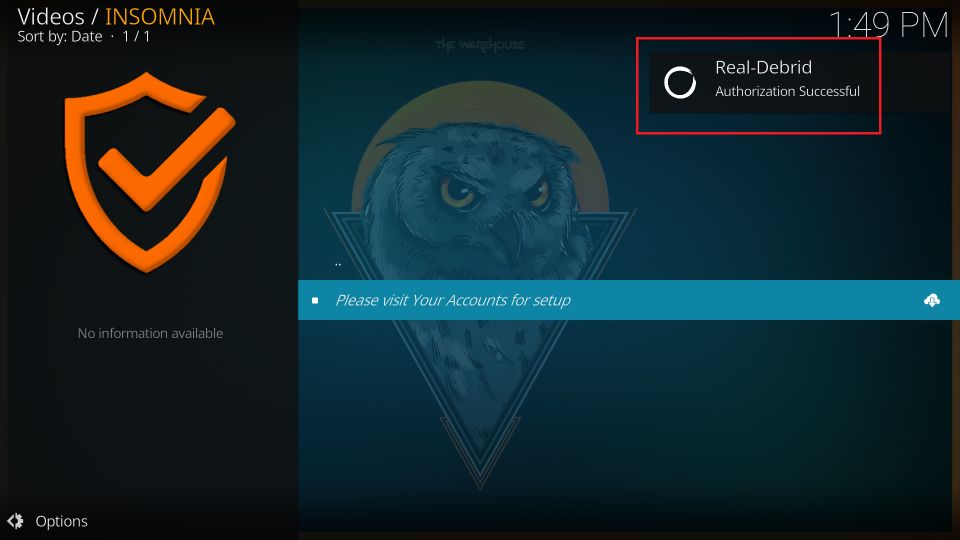
7. You should see the Real-Debrid Authorization Successful notification in the top-right corner.
This method is how you set up Real Debrid with the Insomnia Kodi addon.
Wrapping Up
This guide provided step-by-step instructions to install the Insomnia Kodi addon. You may now start watching your favorite movies and shows.
Related:
Legal Disclaimer – FireStickTricks.com does not verify the legality or security of any add-ons, apps or services mentioned on this site. Also, we do not promote, host or link to copyright-protected streams. We highly discourage piracy and strictly advise our readers to avoid it at all costs. Any mention of free streaming on our site is purely meant for copyright-free content that is available in the Public domain. Read our full disclaimer.
Disclosure – FireStickTricks.com is reader-supported blog. When you buy a product through links on our site, we may earn commission. Learn More