
No products in the cart.
Work From Home
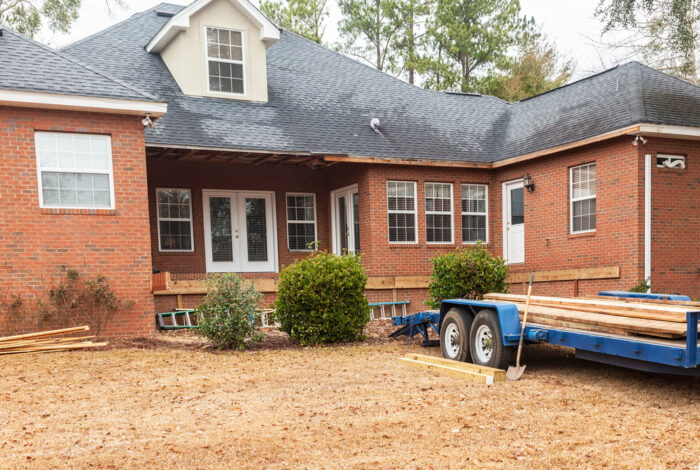
10 Easy Tips to Deck a Trailer
08
Mar
Mar
Home Business Magazine Online
Decking a trailer is a fantastic process that increases your trailer’s weight capacity and appearance. It’s a fantastic way to create extra room in your cargo area, and it only takes a few days to finish. This guide walks you through the steps necessary for proper trailer decking without going over your budget or making any significant modifications.
1. Understand Your Business’s Needs
Before starting, it is best to step back and think about what to accomplish with your trailer decking project. Think of several reasons why take on this project in the first place. Is it because your trailer is too small? Do you want a second level for extra storage room? Do you keep items dry during the shipping process? Will multiple people use this, so durability is necessary? Write down your reasons and what you hope to accomplish.
As a business owner, it’s best to build a deck that suits your company’s needs. For example, if you expect frequent heavy shipments from customers or partners, you want to have a sturdier deck so no damage occurs to things when moving around the trailer. However, if you want to store some extra items in your cargo area, then a standard deck with heavy-duty beams does the trick.
2. Choose the Wood Type for Decking a Trailer
After you decide what you want to accomplish, it is essential to think about the type of wood you use for this project. Scrap pieces of hardwood might be cheaper to use than purchased pre-cut pieces; however, if aesthetics are concerns, then pre-cut pieces are possibly the best choices.
There are many usable types of wood for decking a trailer. When choosing the type of wood, always think about your budget and the amount you want to spend. A cheaper option is any hardwood that is easy to cut through.
Here are some types of wood to use for decking a trailer:
- cedar: This is an excellent type of wood that’s easy on the wallet, and it looks great when finished. It requires no pre-sanding to ensure that the surface is smooth.
- pine: This type of wood is also inexpensive, but the drawback is that it requires pre-sanding to ensure that there are not any splinters.
- Pressure Treated Wood: Although more expensive, this type of wood comes pre-treated, so it’s safe to use. It requires no pre-sanding, because the surface is already smooth.
- White Oak: This type of wood is little more expensive, but it looks fantastic and is much easier to cut through than red oak.
- Red Oak: This type of wood is a little more challenging to cut through, requiring pre-sanding.
- Apitong: This type of wood is more expensive than the other types, but it’s also the lightest and least likely to warp over time.
- Maple: This type of wood is easy to cut through, but it needs pre-sanding, and the surface possibly needs a staining coat before you apply a sealer.
If you want a more striking and classier look, consider using a type of hardwood that’s difficult to cut through. A popular choice in this category is Black Walnut or Mahogany. thesis types of wood are usually long-lasting and highly durable, making them perfect for the high demands of your business.
3. Sand the Existing Surface
Regardless of the wood type you use, there is a great chance it is splintery or rough to the touch. Before you install anything, sand down your existing surface with either an electric sander or a hand sanding block. It makes your new decking look like a natural part of the trailer.
This process ensures that you won’t have any problems installing your new deck. You also use this opportunity to sand down any rough areas on the trailer itself, which creates a fresher and cleaner look.
4. Remove any debris
After you sanded the surface of your trailer, it is necessary to go back over it with a vacuum or dust buster before applying the new decking. It is very common for debris like sawdust or splinters to remain on your cargo area after sanding, and it prevents the decking from sticking properly.
The best and easiest way to remove debris is to take a shop vac and run it over the entire surface. Once you complete this step, wipe down your cargo area with a damp cloth. It removes any excess dust or fine particles that possibly interfere with the installation of your new deck.
5. Apply the Adhesive
After sanding the surface, it’s time to apply the adhesive. You do this step by following the directions on your particular brand of adhesive.
Be sure during this step that any adhesive products are not dripping or spilling onto the surface. Also ensure that you are thorough in your adhesive application; however, you do not want any excess compound running off the side before it dries.
6.Install the Trailer Decking
When the adhesive dries up, go ahead and install the decking itself. Most people find that it is best to start from the front and work towards the back of the trailer.
You possibly need to cut the decking in certain areas, but it likely fits snugly regardless of what type you used. If you notice any gaps between your new deck and your old surface, be sure that there isn’t debris in the way before you seal the space.
When you install your new decking, ensure that you leave a large amount of space around the edges. If necessary, use a utility knife and a straight edge in doing this. After you cut out the necessary area, go ahead and lift one edge (similarly to fitting artwork into a frame). Once you install your new deck, it is time for sealing.
7. Seal the decking
Seal everything in place. Many adhesive products on the market work perfectly for this step, and most people find that they’re best applied with foam brushes or paintbrushes. Do note that it takes a while for the sealer to dry.
If you use a water-based sealer, do not apply the product too thickly. That causes it to dry faster than usual and create bubbles on the surface. If you work with an acrylic-type sealant, ensure that there are no areas where the sealer is still wet.
If there is any debris in these sealing areas, it causes problems further down the line when you remove bubbles and stains. In addition, it is unattractive if your decking looks wet when you finish applying all of your sealants.
8. Clean Up Any Spills
There is a chance that you have some excess adhesive drops on your floor once everything dries in place. Before applying the second coat of sealer, clean up any of these spills.
It is also good to go over the floor one final time with a damp cloth or shop vac before you apply adhesive again. Ensure that any excess sealant is completely gone and that your floor is as clean as possible for your second application of adhesive.
9. Apply the second coat
After you cleaned your floor, it is time to apply the second coat of adhesive. The same tips pertain here as they did for the first application. Ensure no excess compound runs and that everything is thoroughly dry before this step begins.
It is best to prepare and reserve another full day for this step. Most people find that two coats are the minimum that they put down, and in some cases it is possibly best to put a third coat in place.
10. Clean Up the Floor One Final Time
After your final application dries in place, go over it one last time with a damp cloth or shop vac to remove any excess adhesive or dust from the surface. It ensures that you have a clean, finished decking area once you complete your floor cover installation.
After cleaning up any excess adhesive, go ahead and install your floor cover on top of the new surface. Many people simply go with a rubber floor mat, although there are plenty of other options. If you have any leftover products from your initial application process, these products work great for your final sealing layer.
Extra Tips to Maintain Your Deck
Once you install your new surface, it is necessary to keep up with your maintenance routine. Removing any build-up of dirt and grime around the floor’s perimeter ensures that anything underneath does not trap inside. That includes cleaning up spilled liquids (which you take care of immediately).
It is also crucial to keep your deck clean regularly to prevent any excess dirt from getting between cracks in the sealant. This also extends the life of your deck flooring.
Final Thoughts
While many businesses find that their decks are just fine for fulfilling their functions, others put in the effort necessary to install fresh trailer deck floors. Investing in a new deck is an excellent way to increase the durability of your trailer and to keep it looking sharp.
However, take the time and put in the effort to ensure that everything goes smoothly during installation. By following this set of guidelines and working out any kinks beforehand, you know what steps are necessary for a successful installation.
the post 10 Easy Tips to Deck a Trailer appeared first on Home Business Magazine.